Welcome to your go-to guide for understanding whether you need gravel under concrete. If you’re planning a concrete project, whether it’s a driveway, patio, or foundation, you may be wondering if this extra step is truly necessary. It’s a common question among homeowners and DIY enthusiasts looking to save time and money, but skipping gravel could lead to long-term headaches. Gravel is more than just a filler; it plays a critical role in the stability, drainage, and longevity of your concrete slab. In this post, we’ll explore why gravel is important, when it’s necessary, and how it affects the overall durability of your project. Whether you’re tackling a small pathway or a large foundation, understanding the role of gravel could save you from costly repairs down the road. Let’s dive into everything you need to know about using gravel under concrete.
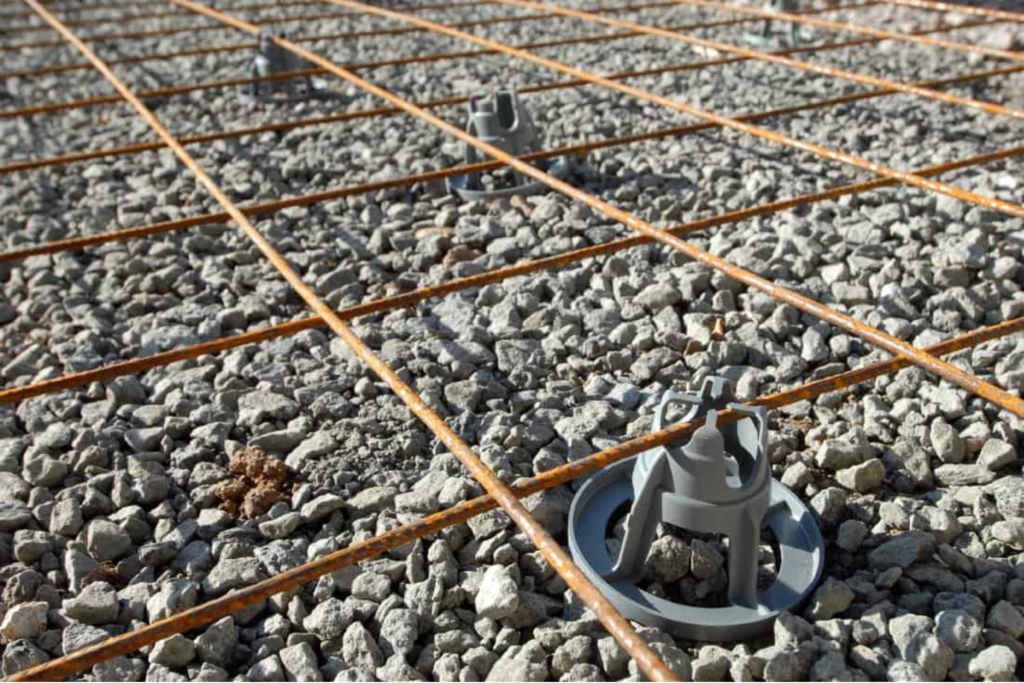
Gravel is essential under concrete because it provides a stable base, improves drainage, and helps distribute the load evenly. A gravel layer prevents water accumulation beneath the concrete, which can cause cracking and shifting over time. For most projects, a 4-6 inch layer of gravel is recommended to ensure durability and prevent costly repairs in the future.
Table of Contents
Why Gravel Is Important Under Concrete
When it comes to constructing a long-lasting and stable concrete foundation, one essential element that is often overlooked is the layer of gravel placed underneath the concrete. Whether you’re working on a driveway, patio, or foundation for a building, incorporating gravel is critical to ensuring the strength and longevity of the concrete. Here’s a detailed look into why gravel is so important under concrete and how it contributes to the structural integrity of your project.
Structural Support
Load Distribution
One of the primary reasons gravel is used beneath concrete is its ability to evenly distribute weight. Concrete alone, while incredibly strong in compression, can be susceptible to cracking if placed directly on uneven or weak ground. Gravel helps to create a stable and level base for the concrete, effectively spreading out the load that the concrete will bear over time.
When vehicles, foot traffic, or even heavy machinery are applied to a concrete surface, that weight needs to be transferred evenly to the ground below. Without gravel, certain spots may bear more weight than others, leading to cracks or damage. The gravel acts as a buffer, ensuring that the pressure from the load is evenly distributed across the surface, reducing the risk of damage to the concrete.
Concrete’s Weakness in Compression
While concrete is strong in terms of compression, it has one major weakness—it is brittle and prone to cracking under tension. If the sub-base beneath the concrete is unstable or allows for movement, it can cause the concrete to crack under pressure. Gravel provides the necessary support by creating a firm and compacted base. By doing so, it minimizes the chances of the concrete shifting or cracking due to settling or ground movement.
Drainage Benefits
Prevention of Water Accumulation
Water accumulation beneath concrete can pose a significant threat to its integrity. Over time, if water pools beneath the concrete slab, it can cause a variety of issues such as cracking, erosion, and even frost heave in colder climates. During freezing and thawing cycles, water that gets trapped beneath the concrete can expand and contract, leading to cracks and damage.
Without proper drainage, water has nowhere to go, and it can become trapped under the slab, leading to long-term damage. This is where gravel becomes crucial. By providing a permeable layer, gravel allows water to flow away from the concrete, preventing it from pooling and causing damage.
Gravel’s Role in Drainage
Gravel acts as a natural drainage layer beneath concrete, allowing water to escape from underneath the slab. It is typically made up of crushed stones that are small enough to compact yet large enough to create spaces between them. These spaces allow water to pass through and disperse, preventing it from getting trapped under the concrete surface.
By ensuring that water has a way to flow away from your concrete, you reduce the likelihood of cracking and the other issues associated with water damage, such as freeze-thaw cycles. This drainage system is essential for maintaining the longevity and durability of the concrete structure.
Longevity of the Concrete
How Proper Gravel Installation Extends the Life of Your Concrete
The longevity of a concrete project is directly influenced by the foundation beneath it. By using gravel as a base, you’re not only providing structural support and improving drainage but also ensuring that your concrete surface will last for many years. Properly installed gravel helps to prevent the concrete from shifting, cracking, and deteriorating prematurely.
When you invest in the right base materials, such as gravel, you’re essentially protecting your concrete from the common issues that lead to costly repairs down the line. In the long run, the use of gravel contributes to a more durable and stable concrete structure, minimizing the need for frequent maintenance or repairs.
Cost vs. Benefit
At first glance, adding a layer of gravel beneath your concrete might seem like an added expense. However, when you consider the potential costs associated with repairing or replacing damaged concrete, the small investment in gravel becomes much more appealing. Without a proper gravel base, you may face cracks, shifting, and water damage, all of which can lead to expensive repairs.
On the other hand, by including gravel in your project from the outset, you’re ensuring that your concrete will last longer, reducing the likelihood of costly repairs or replacements. The cost of installing gravel is significantly lower than the cost of fixing a damaged concrete slab, making it a wise investment for the long-term durability of your project.
Gravel plays an essential role in ensuring the structural integrity, drainage, and longevity of any concrete project. From providing a stable base that distributes weight evenly to acting as a drainage layer that prevents water from accumulating under the slab, gravel is key to avoiding many of the common issues that can damage concrete over time.
By investing in gravel as part of your concrete project, you’re not only improving the quality of your structure but also potentially saving yourself from costly repairs in the future. The benefits of gravel far outweigh the initial costs, making it a vital component of any well-constructed concrete foundation.

When Is Gravel Necessary Under Concrete
Gravel is a crucial material for many concrete installations. It provides the stability, support, and drainage necessary for the longevity of your concrete structure. In this detailed guide, we’ll explore when gravel is necessary under concrete, why it matters, and the alternatives you can consider for certain smaller projects. Here’s a breakdown of gravel’s role in various concrete applications, from driveways to patios and foundations.
Driveways and Pathways
- Heavy Load Support: When it comes to driveways and pathways, gravel becomes indispensable due to the heavy loads exerted on the concrete surface. Vehicles, especially larger ones like trucks or SUVs, apply significant pressure to the concrete. Over time, this weight can cause the concrete to settle unevenly, leading to cracking and premature wear. Gravel provides a solid, stable base that distributes this weight more evenly, ensuring your driveway or pathway remains structurally sound for years to come.
- Preventing Cracking and Shifting: Cracking and shifting are common problems with concrete, particularly in areas with fluctuating temperatures or moist conditions. Without a gravel layer, the soil beneath the concrete can move, especially after heavy rain or during freeze-thaw cycles. Gravel acts as a buffer, helping to prevent this movement by improving drainage and reducing water retention. This mitigates the risk of cracking and shifting, which is essential for maintaining the integrity of your concrete driveway or pathway.
Patios and Sidewalks
- Lighter Load, Still Beneficial: Patios and sidewalks typically bear less weight than driveways, but gravel is still highly beneficial. These areas may not support heavy vehicles, but they still experience foot traffic and exposure to environmental conditions like rain and frost. Gravel under patios and sidewalks helps enhance drainage, preventing water from pooling underneath the concrete. This reduces the risk of erosion, which can compromise the structure over time. Moreover, the added stability ensures that even lighter-use concrete installations maintain their durability and appearance over the long term.
Foundations and Large Slabs
- Critical for Building Foundations: For larger projects like foundations and large concrete slabs, gravel is absolutely critical. When pouring concrete for foundations, the stability of the entire structure depends on the quality of the base layer. Gravel is non-negotiable in these scenarios because it provides the necessary support and drainage to prevent shifting and settling, which could otherwise lead to foundational cracks. This is especially important for buildings, where structural integrity is paramount. A well-prepared gravel base helps distribute the weight of the structure, ensuring long-lasting durability and safety.
Exceptions or Alternatives
- Small Projects: There are some cases where gravel may not be strictly necessary, particularly for smaller projects like garden paths or certain DIY tasks. For example, if you’re creating a simple garden walkway that won’t bear heavy loads, you might be able to use alternatives such as sand or compacted soil. Sand provides a smooth, even surface, and compacted soil can offer sufficient stability for light foot traffic. However, it’s important to note that while these alternatives may work for smaller, low-impact projects, they may not provide the same longevity or drainage benefits that gravel offers.
In most cases, gravel is an essential component beneath concrete, offering crucial support, drainage, and stability. For high-impact areas like driveways and foundations, it’s non-negotiable, as it prevents shifting, cracking, and other structural issues. Even for patios and sidewalks, gravel enhances the overall longevity and performance of the concrete. However, for small, low-impact projects, alternatives like sand or compacted soil may suffice, though they lack the durability and drainage benefits of gravel. Understanding when and why gravel is necessary under concrete helps ensure that your projects, whether large or small, stand the test of time.
How Much Gravel Do You Need
When planning a project involving gravel, one of the most critical decisions is determining how much material you actually need. Gravel serves as the foundation for many outdoor projects, from driveways and walkways to patios and drainage systems. Getting the right amount ensures the longevity and success of your project. In this guide, we’ll break down the essentials for calculating your gravel requirements.
Standard Gravel Depth
Rule of Thumb
For most general outdoor projects, a 4 to 6-inch layer of gravel is the industry standard. This depth provides a stable, solid base that can handle everyday use, whether it’s for a driveway, patio, or garden pathway. However, the specific depth may vary depending on the type of project and the weight it needs to support.
Factors to Consider
- Soil Type: The condition of the soil beneath the gravel matters. Softer, looser soils may require a thicker gravel layer to prevent sinking over time. If your soil is clay-heavy or prone to water retention, a deeper base helps with drainage and prevents erosion.
- Project Size: The size of the area you’re covering influences how much gravel you’ll need. Larger projects like a driveway or patio require more material, naturally. For smaller projects, you might get away with the lower end of the depth spectrum, around 4 inches.
- Load-Bearing Requirements: Consider the weight that will be on the surface. If you’re laying gravel for a path or garden bed, the weight will be light, and a thinner layer may suffice. For driveways or areas with heavy foot or vehicle traffic, a thicker gravel base (closer to 6 inches or more) is essential for stability.
Types of Gravel
Choosing the right type of gravel can greatly impact the functionality and aesthetics of your project. There are several types to consider, but two of the most commonly used for outdoor projects are crushed stone and pea gravel.
Crushed Stone vs. Pea Gravel
- Crushed Stone: This gravel type consists of larger, irregularly shaped stones that have been mechanically crushed. It’s often used as a base material because of its ability to pack down firmly. Crushed stone provides excellent drainage and is ideal for high-traffic areas like driveways or patios. One downside is that its rough edges may not be as visually appealing for decorative uses.
- Pros: Great for drainage, highly durable, excellent for driveways.
- Cons: Can be rough underfoot, less visually pleasing for landscaping.
- Pea Gravel: Smaller, rounder stones that resemble peas (hence the name). Pea gravel is softer underfoot, making it a great choice for pathways and garden areas. It’s also aesthetically pleasing and often used in landscaping or around patios. However, its round shape means it doesn’t compact as tightly as crushed stone, making it less suitable for high-traffic or load-bearing areas.
- Pros: Aesthetic appeal, smooth texture, great for pathways and landscaping.
- Cons: Not ideal for driveways or heavy loads due to poor compaction.
Sourcing the Right Material
Once you’ve determined how much gravel you need and the type that’s best for your project, the next step is sourcing it. Here are a few tips on where to find the right gravel.
- Local Hardware Stores: Many large hardware stores, like Home Depot or Lowe’s, carry various types of gravel in bulk. This can be a convenient option if you need a smaller amount or if you’re working on a tight timeline.
- Landscaping Suppliers: Specialized landscaping or stone supply companies often have a wider range of gravel types, especially if you need larger quantities. These suppliers can also offer advice tailored to your specific project and sometimes deliver the material directly to your location.
- Quarries and Gravel Pits: For larger projects, purchasing gravel directly from a quarry or gravel pit can be the most cost-effective option. Many of these businesses sell by the cubic yard or ton and offer discounted rates for bulk purchases.
- Online Retailers: Some online suppliers ship gravel straight to your door. This can be helpful if you’re working on a smaller project and need convenience, but shipping costs can be higher for bulk materials, so it’s worth comparing prices.
Calculating how much gravel you need depends on several factors, including the type of project, the kind of gravel, and where you source it. Always ensure you account for soil conditions, traffic weight, and project scope when making your decision. The right amount of gravel, combined with proper installation, will provide a stable and long-lasting foundation for your outdoor spaces.

How To Prepare The Ground Before Pouring Concrete
Proper ground preparation is crucial to ensuring your concrete project is stable, durable, and long-lasting. A poorly prepped surface can lead to cracks, unevenness, or sinking, compromising the quality of your project. Below, we’ll walk you through the essential steps to prepare the ground before pouring concrete. These steps are designed to be practical and easy to follow for DIY enthusiasts and professionals alike.
Clear and Level the Area
Clearing and leveling the area where you intend to pour concrete is the foundation of any successful project. If the surface is uneven, the gravel and concrete layers won’t sit properly, leading to weak spots and potential cracking.
How to Clear and Level the Area
- Mark the Area: Begin by marking the perimeter of your work area with stakes and string or spray paint. This ensures you know exactly where you’ll be working.
- Remove Obstacles: Clear any debris, rocks, roots, or vegetation from the designated area. Use a shovel, rake, or a landscaping tool to ensure nothing interferes with the concrete.
- Level the Ground: After clearing, level the area using a rake or a shovel. Ensure the ground is as flat as possible by eye or using a level. A flat surface ensures that the concrete and gravel sit evenly, which will help maintain the strength of the finished slab.
- Use a Tamper: After leveling, tamp the area down with a hand tamper or a mechanical tamper. This compacts the soil and provides a stable base, preventing future settling or shifting.
Consider checking the weather conditions before starting the project. Preparing the ground during dry weather makes it easier to achieve a stable and even surface.
Installing a Gravel Base
A gravel base is essential for drainage and preventing the concrete from cracking due to ground movement. It creates a stable and well-drained foundation, which helps the concrete last longer and remain free of cracks.
Compact the Soil
Before you add the gravel, it’s crucial to compact the soil. Loose or uneven soil can cause the concrete to settle unevenly.
- After leveling the area, use a hand tamper or a plate compactor to press the soil firmly down.
- Walk the compactor across the area multiple times, ensuring that the soil is compacted evenly. Pay special attention to the corners and edges, as these areas are more prone to movement.
- If the soil feels soft or bouncy underfoot, continue compacting until it feels firm and solid.
Spread and Compact the Gravel
Once the soil is compact, it’s time to add the gravel base.
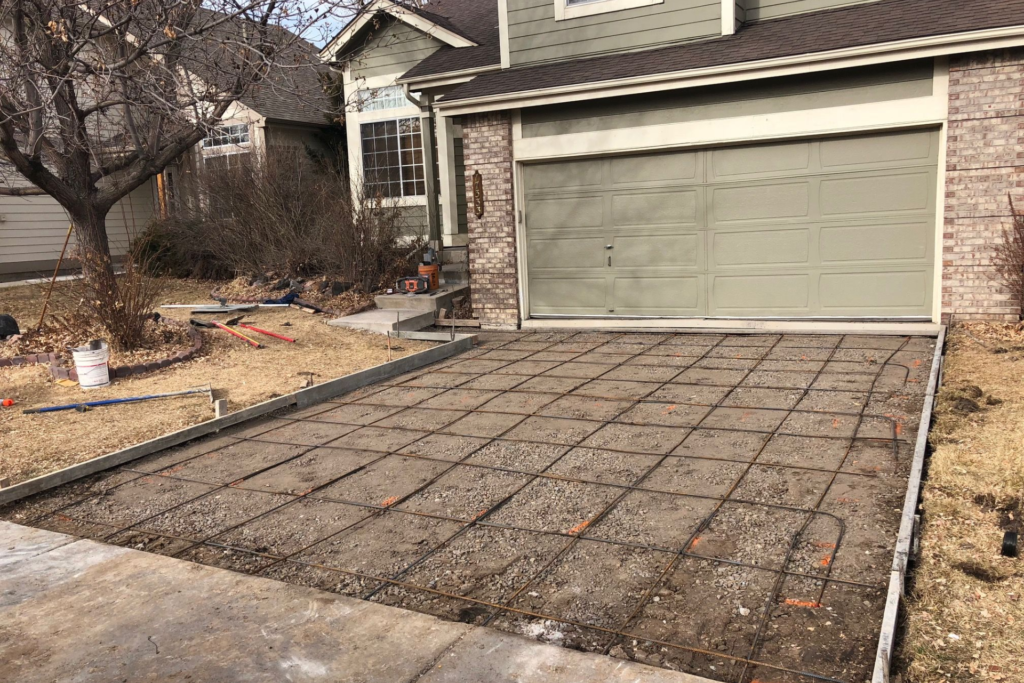
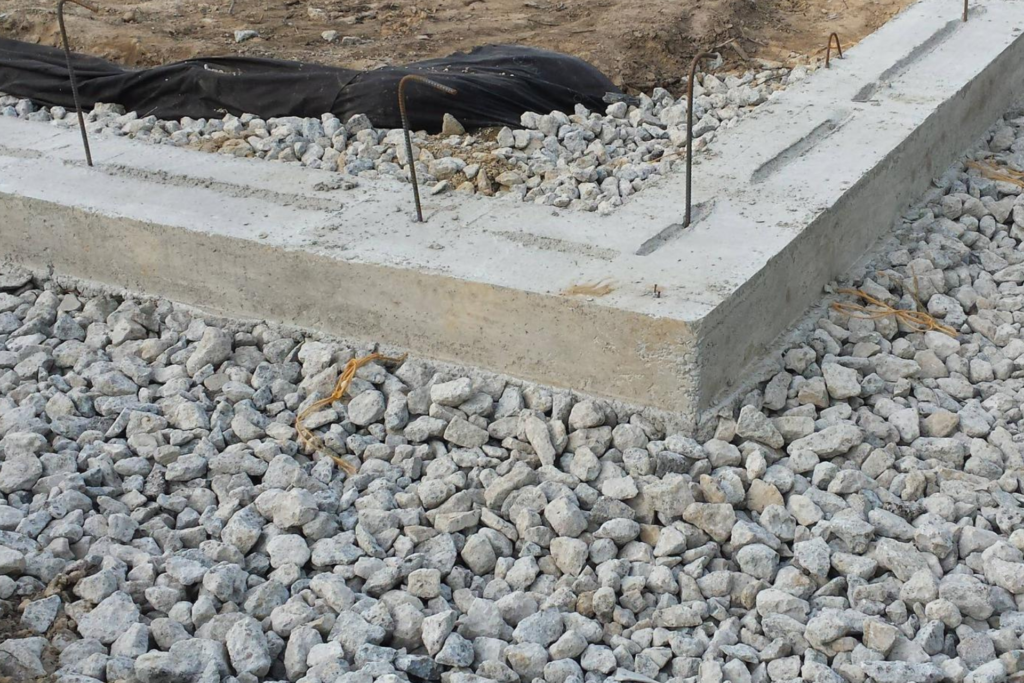
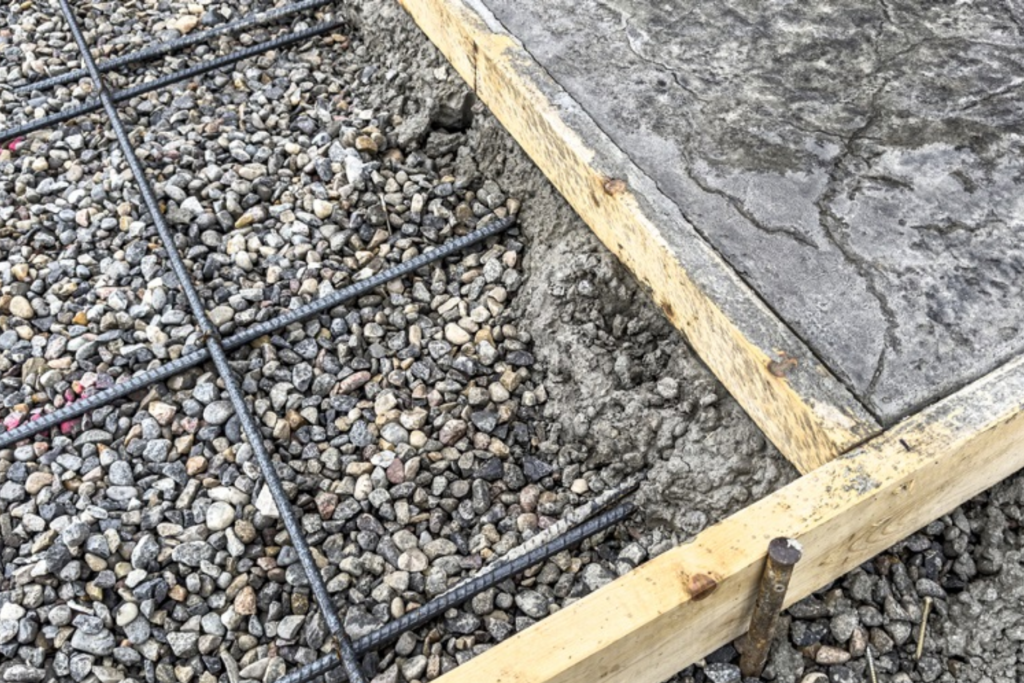
- Pour the gravel (typically 3-4 inches thick) across the compacted soil. For a standard concrete slab, you’ll want to use a type of gravel known as “crushed stone” or “road base” gravel.
- Spread the gravel evenly across the entire area using a rake. Ensure there are no piles or uneven spots.
How to Compact the Gravel
- Just like with the soil, you’ll need to compact the gravel to prevent future sinking. Use a plate compactor for this step. This tool will vibrate and press the gravel firmly into place, ensuring a stable base.
- Make sure to compact the gravel in layers if you’re working with a thicker base. Compacting 2 inches at a time will provide a more solid foundation.
After compacting, check the surface with a level. If there are any dips or high spots, adjust the gravel before moving forward.
Setting Forms
Forms are essential because they help contain the concrete in the shape you want as it cures. Without proper forms, the concrete could spread unevenly, leading to an unprofessional finish.
- Choose Your Material: Forms are typically made from wood or plastic. Wood is more common for small to medium projects, but plastic forms are often easier to work with for complex shapes or large-scale projects.
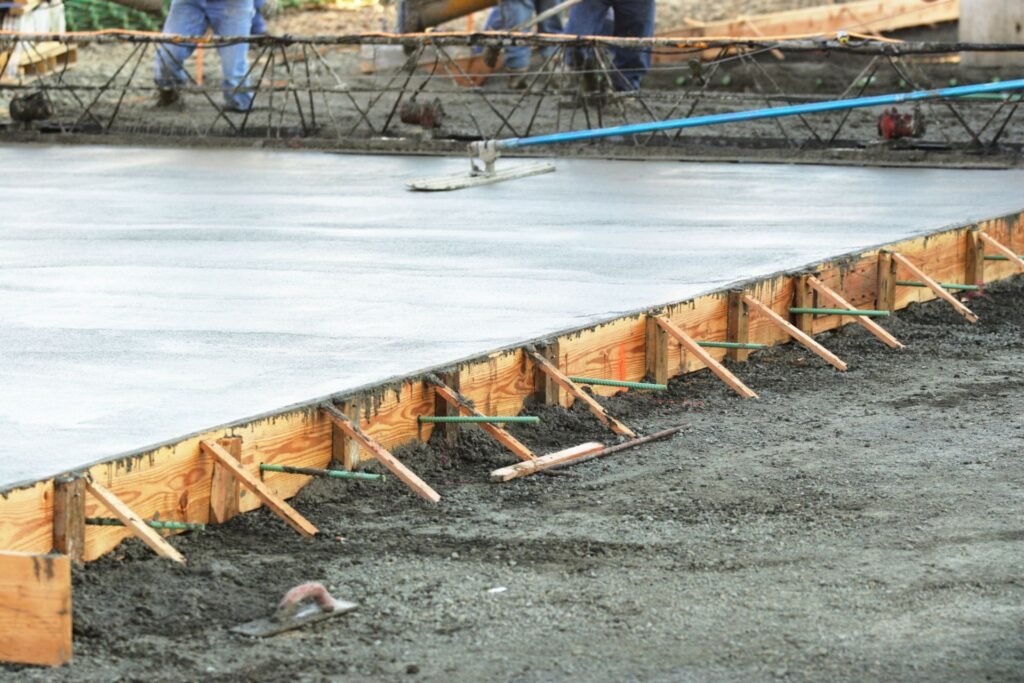
- Install the Forms: Place the forms along the perimeter of the area you plan to pour concrete. Drive wooden stakes into the ground along the outside of the forms to keep them securely in place. Ensure the forms are level and the corners are at right angles by using a carpenter’s square.
- Double-Check: Once the forms are set, check again to make sure they are level and secure. The better your forms are set, the smoother and more professional your concrete finish will be.
Apply a light coat of oil to the inside of wooden forms. This will make it easier to remove the forms after the concrete cures without damaging the edges of the slab.
Final Preparation
Your final step before pouring concrete is to ensure everything is perfectly prepared. A little extra time here will save you from dealing with issues later.
- Check the Gravel Base: Walk over the gravel one last time to make sure it’s compacted and level. If any areas feel soft or uneven, recompact them. Use a straightedge or a long board to run across the surface to check for evenness.
- Secure the Forms: Double-check the forms to make sure they are level and secure. The weight of the concrete will push against them, so they need to be strong enough to hold up.
- Double-Check All Measurements: Ensure that the dimensions of your forms match your project specifications. Make sure the depth of the area is suitable for the thickness of the concrete slab you are planning to pour.
Consider laying down a vapor barrier (plastic sheeting) between the gravel and the concrete, especially if you’re working in an area with high moisture content. This prevents moisture from rising up through the concrete slab, which can cause damage over time.
By following these steps, you’ll ensure that your concrete project has a solid and stable foundation. Preparing the ground properly can make all the difference between a smooth, long-lasting concrete surface and one that cracks and shifts over time. With a level base, compacted soil, and sturdy forms, you’ll be ready to pour concrete with confidence.
What Happens If You Skip Gravel
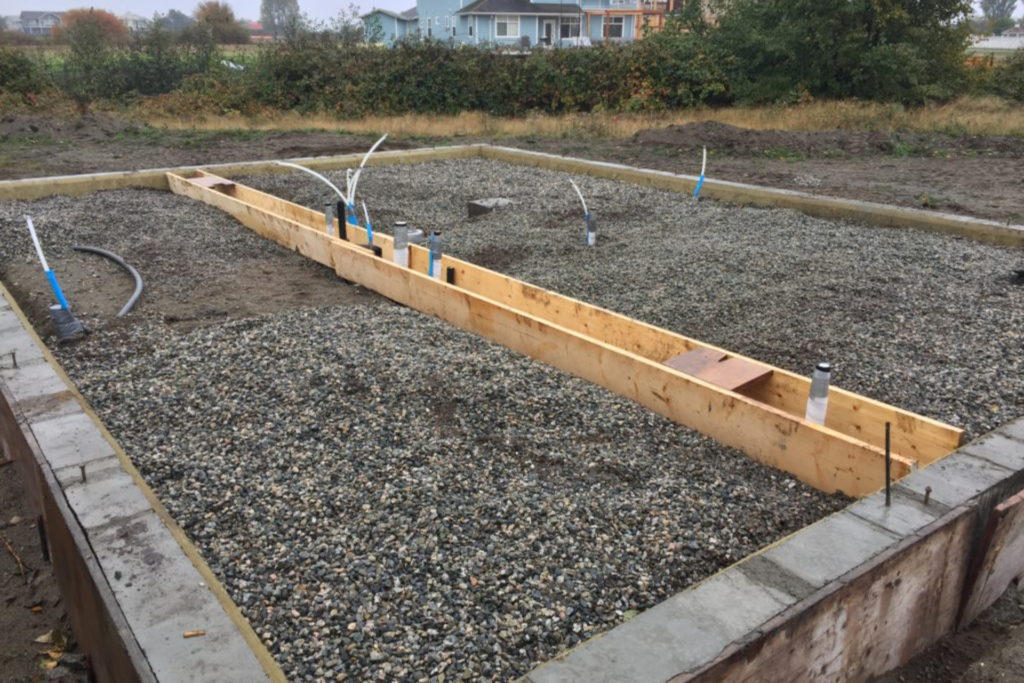
When it comes to pouring a concrete slab, skipping the gravel layer can seem like a quick way to cut costs. However, while it may save you a bit of time and money upfront, the decision can lead to significant problems down the road. Gravel serves as a critical foundation, offering stability and aiding in water drainage. Without it, you risk long-term damage to your concrete, resulting in expensive repairs or even premature replacement. Let’s explore the potential issues you could face by skipping gravel.
Common Problems Without Gravel
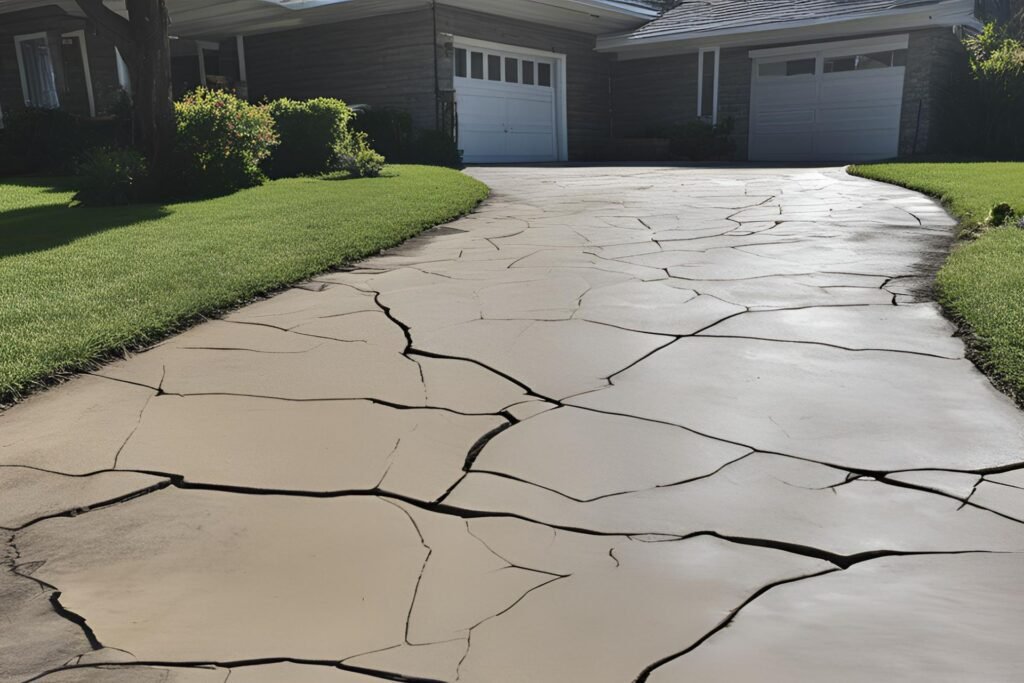
- Shifting Concrete: One of the most critical functions of a gravel base is to provide a stable and even foundation for the concrete. Without this layer, the concrete slab sits directly on the soil, which is prone to shifting due to natural factors like soil movement, expansion, and contraction caused by temperature changes. Over time, this can cause the concrete to shift or crack. Even slight soil movement can create uneven pressure on the slab, leading to hairline cracks at first and eventually more significant structural issues.
- Poor Drainage: Proper drainage is key to maintaining the integrity of a concrete slab, and gravel plays a vital role in this. Without gravel, water has nowhere to go. Water will collect beneath the slab, creating a host of problems, especially in colder climates where frost heave is a concern. When water freezes, it expands, pushing the concrete upwards, which can result in cracking and uneven surfaces. Even in milder climates, poor drainage can lead to soil erosion, which weakens the support beneath the concrete and leads to premature failure.
Short-Term Savings, Long-Term Costs
- Risk of Future Repairs: It’s understandable why some homeowners or contractors might be tempted to skip the gravel layer to save on costs upfront. However, this is a classic case of short-term savings turning into long-term expenses. Without a proper gravel foundation, you are setting the stage for future problems that can be significantly more expensive to fix than the initial cost of the gravel. When the concrete cracks, shifts, or becomes uneven, repairs are not only costly but time-consuming. In some cases, the entire slab may need to be replaced. These potential future costs far outweigh the small savings realized by skipping gravel at the beginning.
Real-Life Examples
- Concrete Failure Stories:There are plenty of real-life examples of projects that went wrong due to the absence of a proper gravel base. In one case, a homeowner decided to forego gravel under their driveway to cut costs. After just one winter, the concrete began cracking and shifting due to water buildup underneath and the freeze-thaw cycle common in colder regions. The driveway, which was supposed to last 25 years, needed significant repairs after only two. In another instance, a commercial building slab was poured directly onto clay soil without gravel. Within a year, the building experienced significant settling, leading to structural damage and requiring a complete overhaul of the foundation.
In both these cases, the attempt to save on upfront costs ended up costing far more in repairs and replacements, proving that skipping gravel is a decision you’ll likely regret in the long run.
While it might seem tempting to skip the gravel base to save time and money, the long-term risks far outweigh any short-term benefits. A solid gravel base provides essential support and drainage, helping to prevent future issues like shifting, cracking, and poor water management. Investing in a proper foundation from the start can save you from costly repairs and headaches down the road.
Alternatives To Gravel
Gravel is widely recognized for its role in various construction projects, providing a sturdy base for foundations, walkways, and other structures. However, depending on the situation, there are alternatives that can serve similar purposes. Let’s explore a few common options that could replace gravel in certain scenarios while keeping in mind their advantages and limitations.
Compacted Sand
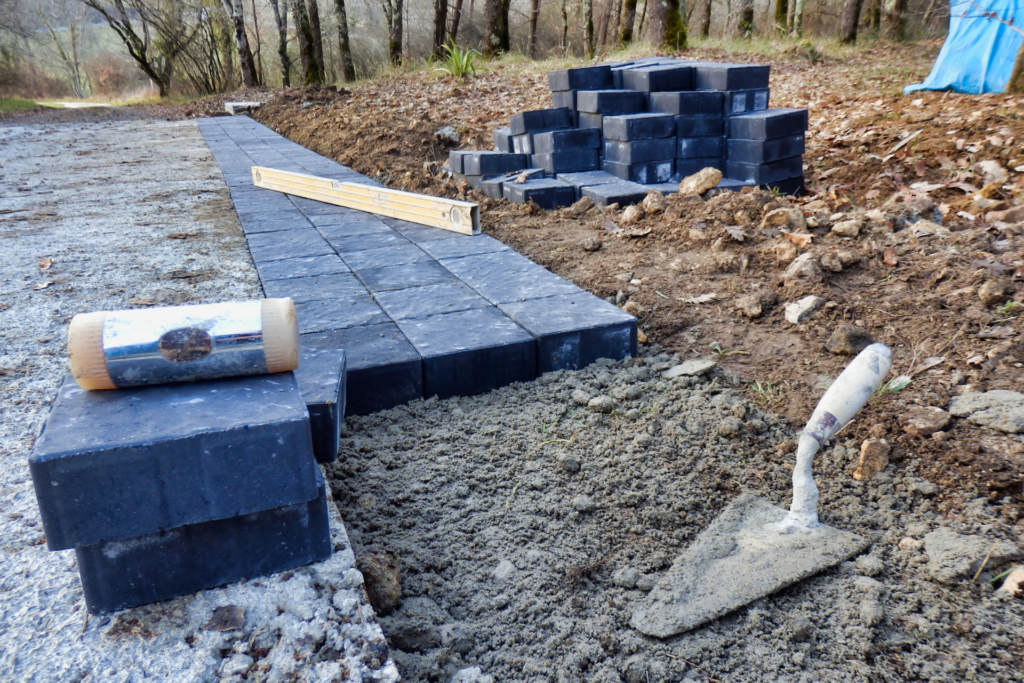
- When It Works: Compacted sand can be a practical alternative to gravel in some construction contexts, particularly for projects requiring a level surface or where drainage isn’t a significant concern. Sand is commonly used in applications such as laying pavers for patios or driveways. Its ability to provide a smooth, even surface makes it ideal for areas where precision is crucial. Moreover, sand compacts well under pressure, creating a stable base, especially for lighter structures or materials like brick or stone.
- Limitations Compared to Gravel: While compacted sand can be useful in some cases, it doesn’t offer the same level of stability and drainage that gravel does. Gravel’s larger, angular particles create voids that allow for superior water drainage, making it a better choice in areas prone to heavy rainfall or flooding. Sand, by contrast, can become compacted to the point of poor drainage, leading to water pooling and potential structural issues over time. In addition, sand may shift or erode more easily than gravel, particularly under heavy loads or in high-traffic areas. For these reasons, while compacted sand is a viable alternative for specific projects, it may not always offer the durability and performance required for more demanding applications.
Foam Board Insulation
- Insulation and Support: Foam board insulation is a much less common alternative to gravel, typically used in niche cases where insulation is a priority. This is more prevalent in regions with extreme climates, particularly where frost protection is needed. In these scenarios, foam boards are installed under concrete slabs or foundations to provide thermal insulation. This helps prevent the ground from freezing and thawing, which can cause significant movement and cracks in the foundation. Foam board insulation serves a dual purpose providing both a supportive base for the concrete and insulating the structure from ground temperature fluctuations. It’s an energy-efficient option, as it helps maintain consistent temperatures within the building, reducing the need for additional heating or cooling.
- Limitations: Despite these benefits, foam board insulation has a few significant drawbacks when compared to gravel. First, it’s not designed to support heavy loads in the same way gravel can. Foam boards work well in residential or light commercial foundations but may not be suitable for heavier industrial projects. Additionally, they are more expensive than traditional gravel, making them less cost-effective for large-scale projects unless insulation is a key concern. As such, foam board insulation is best used in specific climate-driven situations, rather than as a universal gravel replacement.
Recycled Concrete
- Eco-Friendly Option: Recycled concrete is an increasingly popular alternative to gravel, particularly for those looking to reduce their environmental footprint. It involves crushing old concrete from demolished structures and reusing it in new projects. The appeal of recycled concrete lies in its sustainability; by reusing materials that would otherwise go to waste, it reduces the need for virgin gravel, conserves natural resources, and lowers the carbon footprint associated with construction. In terms of performance, recycled concrete offers similar characteristics to traditional gravel, such as durability, load-bearing capacity, and drainage properties. It can be used in a variety of applications, from laying foundations to building roads and parking lots.
- Limitations: However, while recycled concrete is a solid alternative to gravel, it’s important to ensure the material meets specific quality standards. If not properly processed, recycled concrete can contain contaminants like steel, wood, or other debris that may affect its performance. Additionally, its availability may vary depending on your location, and it could be more difficult to source in areas without active concrete recycling plants. Overall, recycled concrete is a viable, eco-friendly option that can match the performance of traditional gravel, provided it’s processed and sourced correctly.
While gravel remains a staple in construction projects, there are several alternatives worth considering depending on the project’s specific requirements. Compacted sand, foam board insulation, and recycled concrete each have their unique benefits, from cost savings to eco-friendliness. However, it’s crucial to assess the limitations of these materials to ensure the long-term success and stability of your project.
Professional Installation Vs. DIY
When you’re considering a hardscaping or concrete project for your home, one of the first decisions you’ll face is whether to tackle the project yourself or call in a professional. Both approaches have their pros and cons, and the right choice depends on the size and complexity of the job. Let’s break down when it makes sense to DIY and when you’re better off hiring a pro.
When to DIY
If you enjoy hands-on projects and have some experience with home improvement, tackling smaller hardscaping tasks like building a patio, walkway, or garden path can be a rewarding and cost-effective option.
- Small Projects: Small-scale projects such as installing a simple walkway or patio can be well within reach for a DIY enthusiast. These tasks typically involve fewer materials, simpler techniques, and less risk of structural issues. If you have basic tools, patience, and a little know-how, these types of projects can be manageable and save you a significant amount on labor costs.
- Learning Opportunity: DIY projects allow you to gain valuable skills. If you’re not in a rush, smaller jobs can serve as a learning experience, helping you understand the process better for future projects.
However, even for small projects, it’s important to do your homework. Make sure you fully understand the materials, techniques, and tools required to ensure the final product is durable and looks professional.
When to Call in a Pro
While smaller tasks might be perfect for a weekend DIYer, larger and more complex projects are usually best left to the professionals. Here’s why hiring a pro can make all the difference.
- Larger, Load-Bearing Projects: Projects like installing driveways, building foundations, or any job that requires heavy materials and load-bearing structures demand precision and expertise. These types of projects typically involve complex tasks like grading, base preparation, and concrete pouring, which can be difficult for someone without professional training.
- Safety and Longevity: Professionals not only ensure that your project is done correctly but also guarantee that it is safe and built to last. Mistakes in large-scale projects can lead to structural failures, drainage issues, or even safety hazards, all of which can be costly to repair later.
- Time and Convenience: Larger projects often require specialized equipment, significant time, and knowledge of building codes and permits. Professionals can get the job done faster, with better precision, and can manage unforeseen challenges that may arise during construction.
If your project involves anything larger than a simple walkway or patio, or if you’re dealing with driveways, retaining walls, or structural elements, it’s best to hire a contractor who can handle the job professionally and efficiently.
Costs of Hiring a Professional
When it comes to hiring a professional for a hardscaping project, the costs can vary significantly depending on the scope and complexity of the work. Here’s a general idea of what to expect.
- Professional Installation Costs: For professional hardscaping or concrete work, you can expect to pay anywhere from $8 to $15 per square foot for basic installation. However, this price can increase based on the complexity of the project, the quality of materials used, and your location.
- Gravel Base Preparation: If your project requires a gravel base for proper drainage and support, that can add to the cost. Gravel base preparation typically runs between $2 and $5 per square foot. Keep in mind that this step is crucial for long-term durability, especially for driveways and large patios.
- Labor and Equipment Costs: In addition to materials, labor costs can significantly impact the final price. For larger projects, contractors may need to bring in heavy machinery for grading or concrete pouring, which can increase the overall price of the job.
While hiring a professional might seem expensive upfront, it often pays off in the long run by ensuring your project is done right the first time. Plus, many contractors offer warranties on their work, giving you peace of mind that your investment is protected.
Whether you choose to go the DIY route or hire a professional ultimately depends on the size and complexity of your project. For smaller tasks like patios or walkways, a DIY approach might save you money and give you the satisfaction of completing the work yourself. However, for larger, load-bearing projects such as driveways or foundations, investing in a professional can save you from potential headaches and costly repairs in the future. By weighing the pros and cons and considering the scope of your project, you can make the right choice for your home and your budget.

FAQs: About Do I Need Gravel Under Concrete
How deep should the gravel be under concrete?
For most concrete projects, a 4 to 6-inch layer of gravel is recommended. This depth helps provide a stable foundation for the concrete and ensures proper drainage. If you’re working on a larger, more load-bearing structure like a driveway or foundation, consider using up to 8 inches of gravel.
Can I use sand instead of gravel under concrete?
While sand can be used as a base material in some situations, it doesn’t provide the same drainage properties as gravel. Sand is more likely to shift or wash away, which can cause the concrete to settle unevenly. Gravel offers better support and drainage, making it the preferred option for most concrete applications.
What happens if I don’t use gravel under concrete?
Skipping gravel under concrete can lead to several problems. Without proper support, the concrete may crack, shift, or settle unevenly over time. Poor drainage beneath the concrete can also cause water to pool, which may weaken the slab, especially in areas with freeze-thaw cycles. In the long run, not using gravel can result in costly repairs.
Do I need gravel under concrete for small projects like garden paths?
For smaller projects such as garden paths, gravel may not be strictly necessary, but it’s still recommended. Using a thin layer of gravel ensures better drainage and helps prevent the concrete from cracking or shifting. If you’re using pavers or a lighter material, you may be able to use a compacted sand base instead of gravel.
Is it necessary to compact gravel before pouring concrete?
Yes, compacting the gravel base before pouring concrete is crucial. Compaction ensures that the gravel is evenly distributed and stable, preventing the concrete from settling or shifting over time. A plate compactor is often used for this process to create a firm and level foundation.
Can I use recycled concrete as a gravel alternative?
Recycled concrete, also known as crushed concrete, can be used as an eco-friendly alternative to gravel. It offers similar structural support and drainage benefits. However, it’s important to ensure that the recycled material is clean and free of contaminants before using it as a base under concrete.
What kind of gravel is best for concrete projects?
The most commonly used type of gravel for concrete projects is crushed stone, particularly #57 stone, which is a mixture of small and medium-sized stones. Pea gravel can also be used for smaller projects, but crushed stone offers better stability for larger, load-bearing applications like driveways and foundations.
How do I know if I need a gravel base for my project?
Generally, if you’re pouring concrete for a structure that will bear weight, like a driveway, patio, or foundation, a gravel base is necessary. For smaller projects, like pathways or decorative concrete, you might be able to skip the gravel or use alternatives like sand. However, gravel is almost always a good choice for ensuring durability and proper drainage.
Can I pour concrete directly on the ground without gravel?
Pouring concrete directly on the ground is not recommended. Without a gravel base, the ground may shift or settle, causing the concrete to crack. Additionally, poor drainage could lead to water pooling under the concrete, weakening the slab over time. Using a gravel base creates a more stable and durable foundation for your concrete project.
How much does it cost to add gravel under concrete?
The cost of adding gravel under concrete will depend on the size of the project and the type of gravel used. On average, gravel costs around $15 to $30 per ton. For most residential projects, expect to pay between $300 and $500 for a properly installed gravel base, though this can vary based on location and material availability.
Conclusion
In conclusion, using gravel as a base is a crucial step in any concrete project, providing essential structural support, improving drainage, and ensuring long-term durability. Whether you’re working on a driveway, patio, or any concrete foundation, skipping the gravel layer might seem like a time-saver, but it could lead to costly repairs and issues down the road. Proper planning and preparation, including laying down a solid gravel base, can make all the difference in the longevity and strength of your project. It’s always worth taking the time to do it right the first time. If you’ve had any experiences with concrete projects or have questions about gravel bases, we’d love to hear from you. Feel free to leave a comment and join the conversation. Your insights could be helpful to others tackling similar projects.
About the Author:
Mike Veail is a recognized digital marketing expert with over 6 years of experience in helping tradespeople and small businesses thrive online. A former quantity surveyor, Mike combines deep industry knowledge with hands-on expertise in SEO and Google Ads. His marketing strategies are tailored to the specific needs of the trades sector, helping businesses increase visibility and generate more leads through proven, ethical methods.
Mike has successfully partnered with numerous companies, establishing a track record of delivering measurable results. His work has been featured across various platforms that showcase his expertise in lead generation and online marketing for the trades sector.
Learn more about Mike's experience and services at https://theleadguy.online or follow him on social media:

