
Welcome to your go-to guide on using concrete for pavers in NZ. Whether you’re planning a new patio, walkway, or driveway, choosing the right materials can make or break your outdoor project. Concrete stands out as one of the most reliable and cost-effective options for Kiwi homes, offering strength, style, and low maintenance. In this post, you’ll learn the types of concrete available, how to install it, what it costs, and what to consider before you start. If you’re looking to get it right the first time, you’re in the right place.
The best concrete for pavers in NZ includes precast concrete pavers for easy installation, poured-in-place concrete for custom designs, and stamped or coloured concrete for decorative finishes. Each option suits different projects, climates, and budgets, making concrete a versatile choice for NZ patios, driveways, and walkways.
Table of Contents
Why Concrete Is Popular For Paving In NZ
Concrete has become a top choice for paving in New Zealand, and it’s not just because it’s easy to find. Kiwi homeowners and contractors value it for its practicality, cost savings, and long-term performance. If you’re planning an outdoor project like a patio, pathway, or driveway, here’s why concrete continues to lead the way.
Handles NZ’s Mixed Weather With Ease
New Zealand’s weather is unpredictable. One day it’s sunny, the next it’s raining, and in colder regions, frost can be a regular issue. Concrete holds up well across all these conditions. It resists moisture, dries quickly, and doesn’t shift easily under temperature changes when properly installed. That makes it ideal for regions like Canterbury or Wellington, where rain and frost can put pressure on outdoor surfaces. You won’t have to worry about warping, rot, or sudden surface cracking when you choose the right mix and install it correctly.
Costs Less Than Stone Or Brick
Concrete is one of the most budget-friendly paving materials in NZ. Compared to natural stone or clay bricks, it costs less per square metre, both for the material and the labour. Precast concrete pavers are even more affordable if you’re going the DIY route. Whether you’re paving a small garden path or a full driveway, concrete lets you stretch your budget further without sacrificing strength or durability. And because it’s so common, it’s easy to get quotes and compare prices between suppliers.
Easy To Source From Local Suppliers
Another reason concrete is a go-to choice in NZ? You can find it almost anywhere. Major hardware chains like Bunnings, Mitre 10, and PlaceMakers keep concrete pavers and mix on hand year-round. Local concrete suppliers also offer bulk options, coloured mixes, and ready-mix deliveries for poured projects. This convenience saves time and reduces delivery costs. You won’t have to wait weeks for shipping or chase down rare materials from specialty stores.
Long Lifespan With Minimal Upkeep
Homeowners love low-maintenance solutions, and concrete delivers. Once installed, it doesn’t need much attention. A quick sweep and occasional rinse keep it looking good. You can apply a sealant every few years for extra protection, especially if it’s a high-traffic area. Concrete doesn’t attract pests, rot, or shift as easily as timber or gravel. That means fewer repairs and lower costs over time. Many concrete paver jobs last 20 years or more, even with regular use and exposure to the elements.
Whether you’re upgrading your backyard or laying a new driveway, concrete offers the reliability, value, and local availability most New Zealanders are looking for. It’s not just the smart choice, it’s often the easiest one, too.

Types Of Concrete For Pavers
Choosing the right type of concrete for pavers can make a big difference in how your outdoor space looks, feels, and holds up over time. In New Zealand, where weather, terrain, and design preferences vary, it’s useful to understand the different concrete options available. Below are three common types of concrete used for pavers, each with its own set of strengths and trade-offs.
Precast Concrete Pavers
Precast concrete pavers are factory-made and ready to install. They come in uniform shapes and sizes, making them easy to work with, especially for DIY projects. You’ll often find them used in patios, pool areas, walkways, and driveways across New Zealand. Because they are pre-formed, installation is faster and less prone to errors. You simply prepare your base, lay them down, and fill the joints. Their consistency in color and texture means your finished project will have a clean, professional look.
Pros:
- Quick to install with minimal tools
- Uniform appearance
- Readily available at NZ hardware stores
Cons:
- Limited design flexibility
- May look generic in large areas
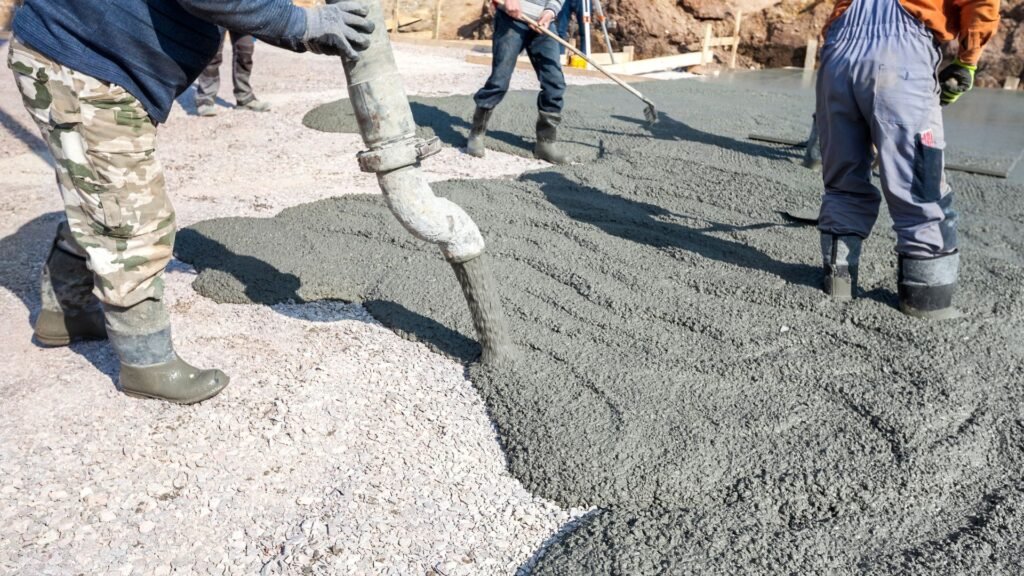
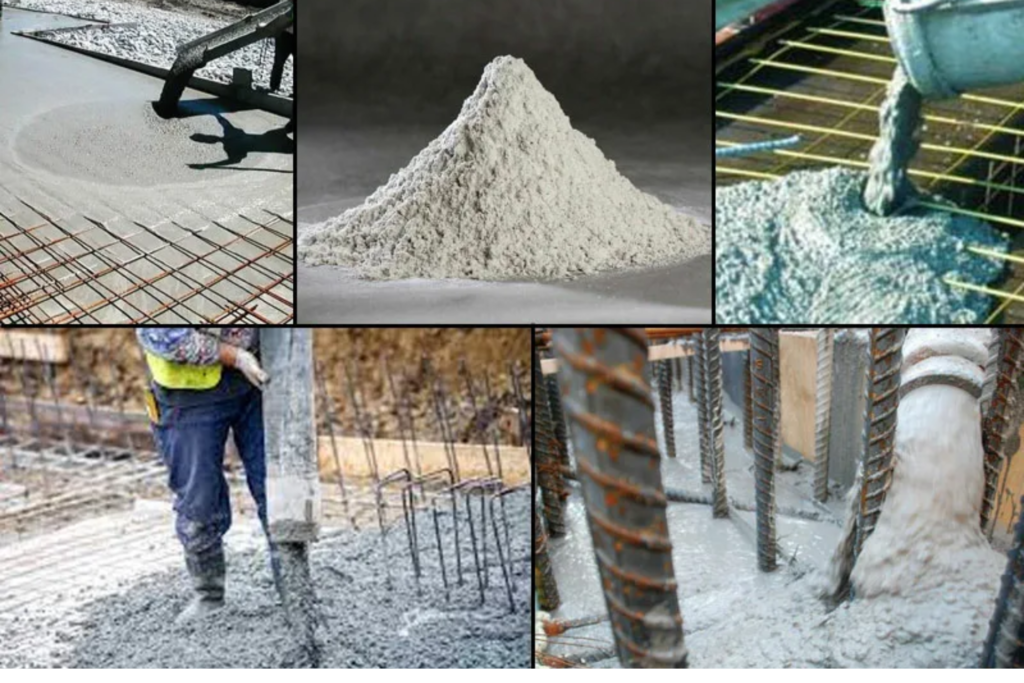
Poured-In-Place Concrete
Poured-in-place concrete gives you full control over the shape and layout of your paved area. This method is great for uneven or sloped spaces where precast pavers might not sit properly. You can also choose from different surface finishes, such as broomed, troweled, or exposed aggregate. While this option requires more prep and skill, often needing formwork and proper curing, it’s ideal for curved paths or custom-shaped patios.
Pros:
- Fully customizable in shape and texture
- Better suited for uneven ground
- Fewer visible joints
Cons:
- Installation is time-consuming
- Mistakes are harder to fix once poured
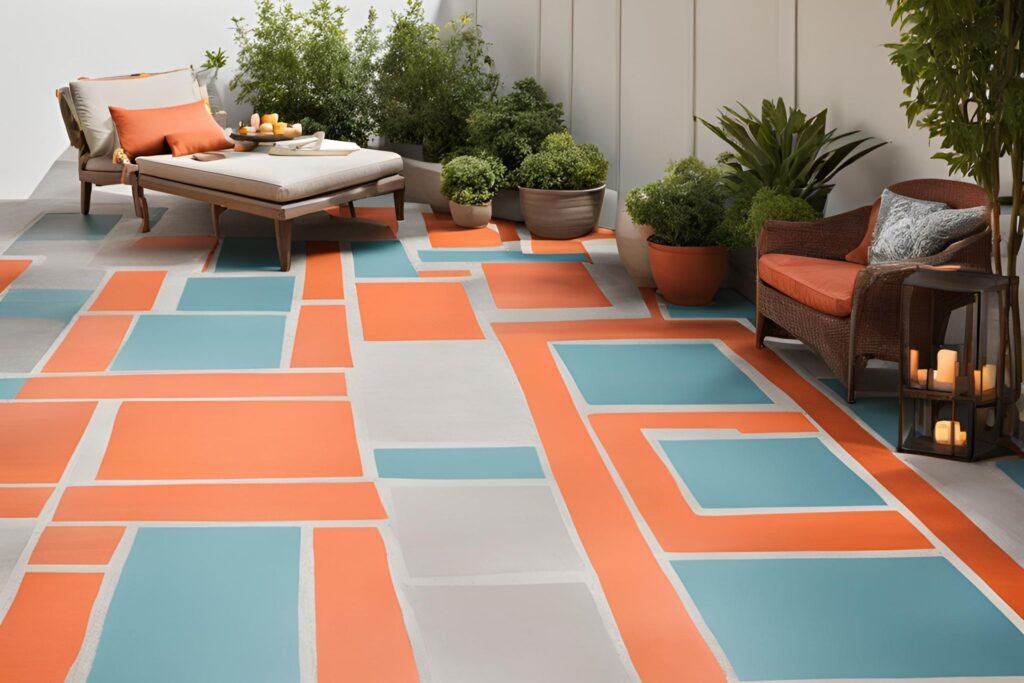
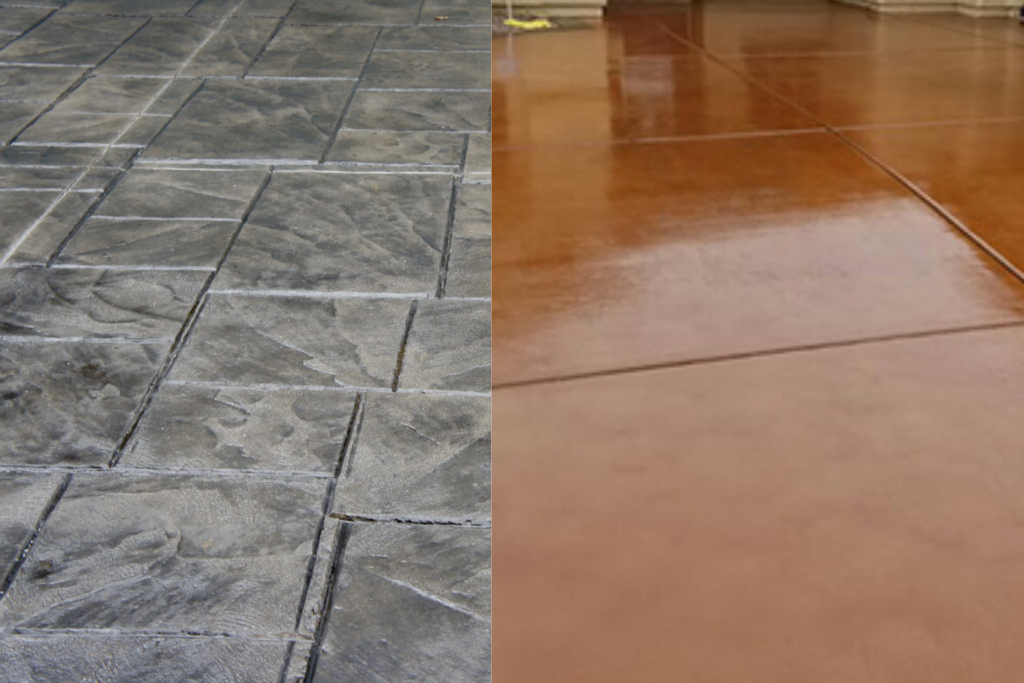
Stamped Or Coloured Concrete
If you want the look of stone, brick, or tile without the high cost, stamped or coloured concrete is a smart option. This type of concrete is poured and then patterned using stamps while still wet. Colour can be added to the mix or applied to the surface, giving your paving a unique finish. It works well in both residential and commercial settings, offering a decorative yet budget-friendly solution.
Pros:
- Visually appealing with many pattern options
- Mimics premium materials at a lower cost
- Durable when sealed properly
Cons:
- Requires experienced installation
- Repairs may be more visible
Which One Fits Your Project Best?
Think about your priorities. Do you want full creative control, or are you looking for a quick and easy install? Precast pavers are best if you value simplicity and speed. Poured concrete works for more complex layouts. Stamped concrete gives your space a high-end look without a high-end price. Whichever option you choose, make sure it matches your site conditions, long-term plans, and budget.

Key Considerations Before You Choose Concrete
Before you buy or pour any concrete, there are a few site-specific details you need to think through. These factors affect how well your concrete pavers will perform over time, especially in New Zealand’s unique outdoor conditions. Taking the time to assess your site properly can prevent future issues like cracking, shifting, or drainage problems. Here’s what you need to look at before choosing your concrete.
Soil Type And Drainage
Not all soil is created equal, and in New Zealand, it can vary widely from one property to the next. You might be dealing with heavy clay, sandy soil, or loamy mix, all of which affect how your concrete base should be prepared.
Clay soils retain water and can shift during wet seasons, making a strong, well-drained base essential. Sandy soil drains quickly but might need more compaction to stay stable. Loamy soils are somewhere in between but still need a proper base layer to support weight. If you don’t address your soil type from the start, your pavers may settle unevenly or crack over time.
Adding a layer of compacted base course material (like GAP 20) helps keep your pavers stable. Proper drainage is just as important. Make sure the area has a slight slope or built-in channels to move water away from the concrete surface.
Climate In Your Region
New Zealand’s weather varies greatly from region to region, and your local climate plays a big role in how you prep your paving area. If you’re living in colder parts of the country, like parts of the South Island where frost is common, you’ll need to take extra care.
Frost causes the ground to expand and contract, which can lead to cracked or lifted pavers if the base isn’t deep or compacted enough. In frost-prone zones, a deeper sub-base and the use of frost-resistant materials are smart precautions. In contrast, warmer, wetter regions may need a focus on good drainage to avoid water damage and moss growth.
Load Requirements
Think about how much weight your paved surface will need to support. A path that handles only foot traffic has different requirements than a driveway used daily by heavy vehicles.
For light footpaths or garden walkways, a standard concrete mix with a moderate base may be enough. Patios may need a bit more strength depending on how much furniture or foot traffic they’ll support. Driveways require thicker slabs or pavers and a deeper, well-compacted base to carry the weight of cars without cracking or sinking.
Choosing the right concrete type and thickness based on load will make a big difference in how long your paved area lasts.
Council Regulations
Before starting any paving project, it’s a good idea to check with your local council. In some areas of New Zealand, there are regulations around how surfaces drain, especially if you’re near a boundary, waterway, or public path.
You might also need to consider things like easements, which are legal access rights for utilities or shared driveways. Some councils may ask for a resource consent if you’re paving a large area or changing natural drainage flows.
Taking time to check council requirements early on can save you time and headaches later. It also ensures your project stays compliant and avoids any legal trouble down the line.
Getting your base conditions right is one of the most overlooked but critical steps in any paving job. The type of soil you have, the climate you live in, how much weight the area will carry, and what the council allows, these all influence how you plan and build your concrete base. By thinking through these points ahead of time, you’ll end up with a paving job that looks better, lasts longer, and stays safe to use year-round.

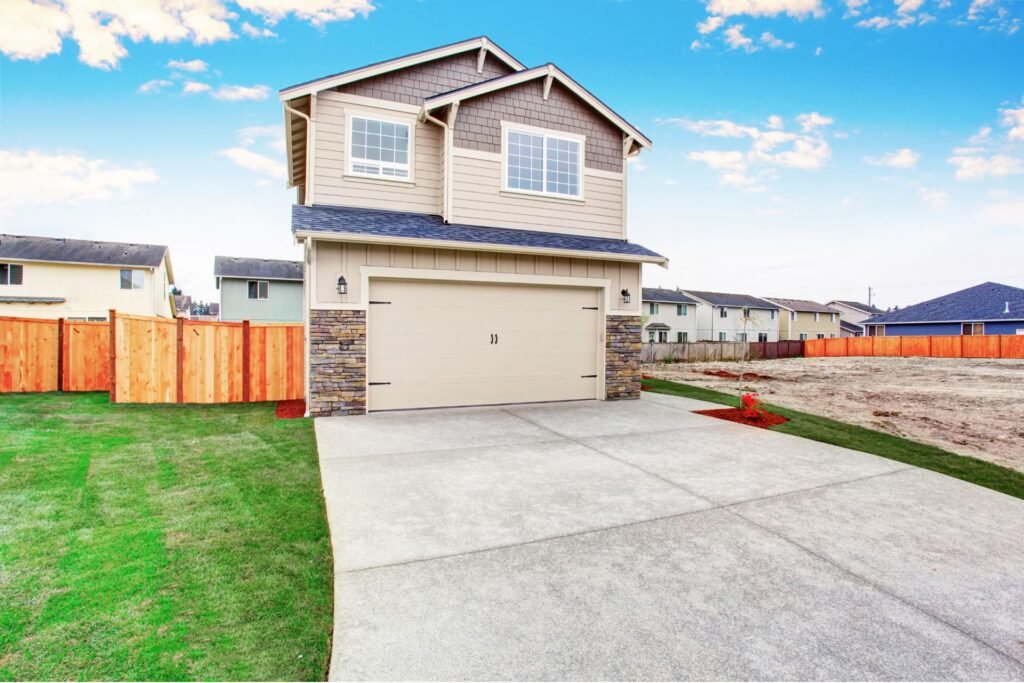
How To Lay Concrete Pavers In NZ
Installing concrete pavers in your New Zealand property can add value, function, and style to your outdoor space. Whether you’re building a patio, a path, or a driveway, the process requires careful planning and the right materials. Here’s a straightforward, step-by-step guide to help you get it done right the first time.
Planning & Marking Out
Start by planning the layout of your paved area. Measure the space and sketch out your design. Use marking spray, string lines, or wooden stakes to outline the perimeter. Make sure your layout is square and aligned with any nearby structures like fences or decks. This planning stage prevents errors later and helps you calculate the materials you’ll need.
Excavating The Site
Once the layout is marked, excavate the area to the correct depth. For paths or patios, dig down at least 150mm. For driveways, you may need to go 200mm or deeper. Remove grass, roots, and loose soil. Slope the base slightly away from buildings for proper drainage, around 10mm per metre is a good rule.
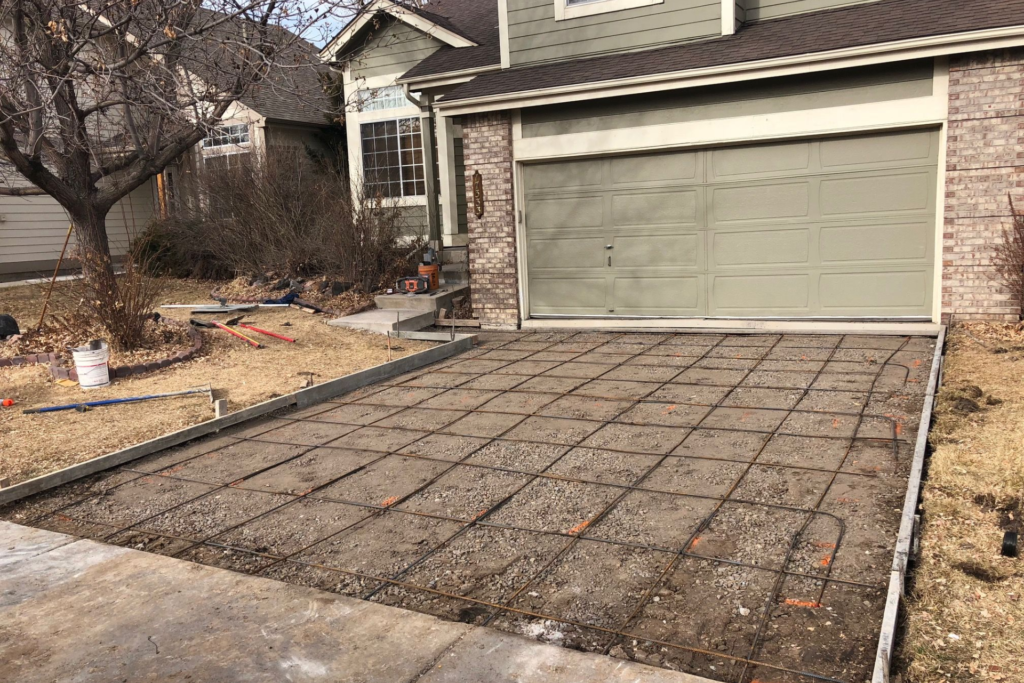
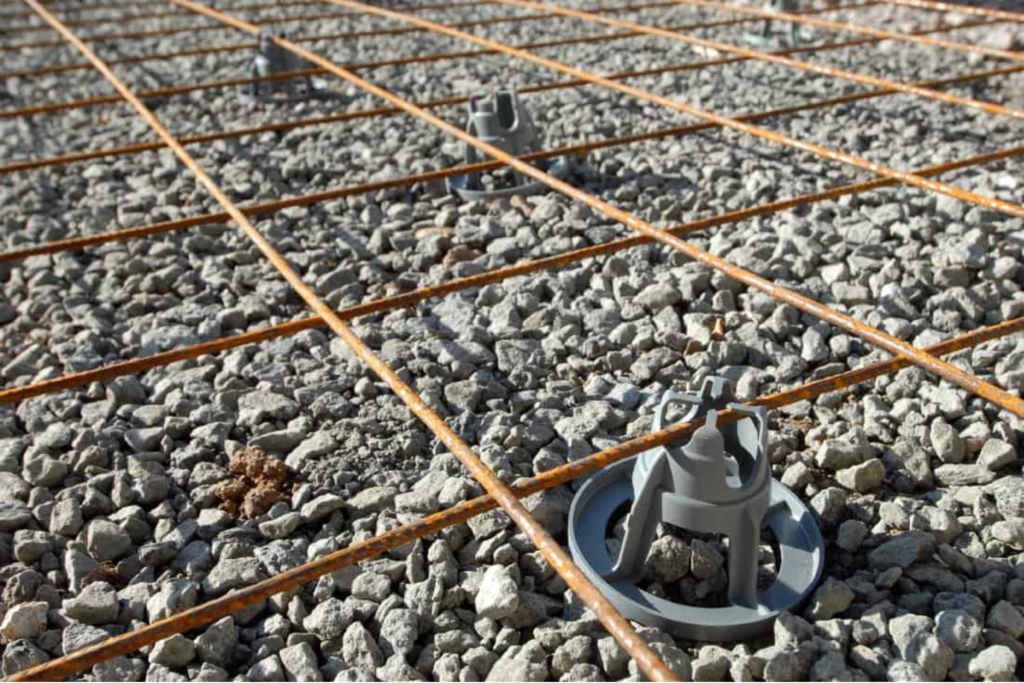
Adding Base Course (GAP 20 Or Similar)
Spread a layer of base course material, like GAP 20 (graded aggregate), across the excavated site. This layer supports the pavers and prevents sinking or shifting over time. Aim for a 100mm layer for paths and 150mm for driveways. Rake it out evenly and make sure it follows your slope for drainage.
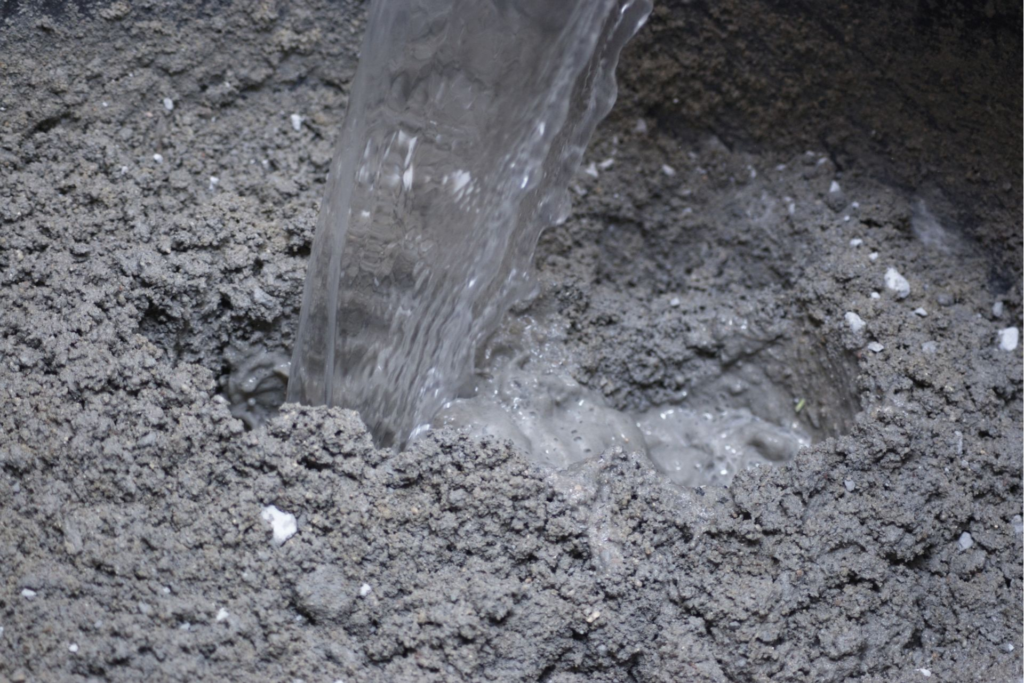
Compacting The Base
Use a plate compactor to compact the base course. This step is critical, do not skip it. A poorly compacted base leads to uneven surfaces and future repairs. Run the compactor over the surface in multiple passes until the base feels solid underfoot and shows no movement. Spray the base lightly with water to help it bind.
Tip: Rent or borrow a plate compactor from your local hire store. It’s worth it.
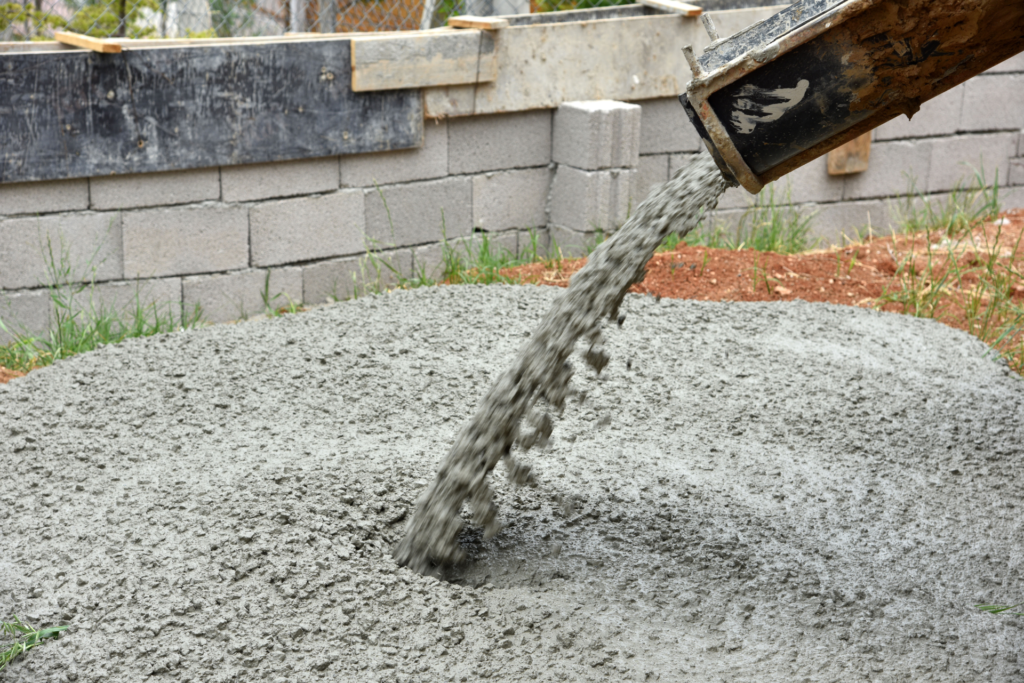
Laying Concrete Or Pavers
If you’re using precast concrete pavers, start from one corner and work your way across in straight lines. Lay each paver firmly into place on the compacted base. Use spacers or eye judgment to keep gaps even. For poured concrete, set up formwork along the edges, mix the concrete, and pour it evenly across the area. Use a screed to level the surface, and finish with a float for a smooth texture.
Adding Sand Or Joint Filler
After laying the pavers, sweep sand or a polymeric joint filler into the gaps. This locks the pavers in place and prevents weed growth. Use a broom to work the filler into every joint. Once filled, run the compactor over the surface again to help the sand settle. Repeat the sweeping process if needed.
Sealing (Optional But Recommended)
Sealing concrete pavers is not required, but it adds an extra layer of protection against stains, moss, and weather damage. Choose a sealer designed for outdoor pavers and apply it with a roller or spray. Sealing also enhances colour and extends the life of your paved surface.
Tip: Always check the weather forecast before starting. Avoid installing or sealing pavers on rainy or windy days. Dry, mild conditions work best.
By following this process, you’ll create a solid, long-lasting paved area that looks clean and functions well in any NZ outdoor setting. Whether you’re building a garden path or a driveway, taking the time to do each step right ensures better results and fewer repairs down the line.

Where To Buy Concrete Pavers Or Mix In NZ
If you’re planning to build a patio, driveway, or garden path, knowing where to buy concrete pavers or concrete mix in New Zealand can save you time and money. Whether you’re looking for ready-made pavers or raw materials to pour your own slab, there are plenty of options available nationwide. From well-known hardware chains to smaller local yards, you can find products that suit your project size, budget, and style.
Mitre 10
Mitre 10 is a popular destination for home improvement across New Zealand. They carry a wide range of concrete pavers in different shapes, colours, and finishes. You’ll also find ready-mix concrete bags and reinforcing mesh if you’re planning to pour your own slab. Mitre 10 is a good option for small to medium DIY projects, and most stores offer trailer hire or local delivery.
Bunnings
Bunnings is another go-to choice for Kiwi homeowners and builders. Their concrete section includes both precast pavers and bulk concrete mix products. Whether you’re creating a garden walkway or laying a new driveway, Bunnings has standard-size concrete pavers and quick-set concrete options. You can also check online stock levels, which is helpful when ordering materials for pickup or delivery.
Firth
Firth is one of New Zealand’s leading concrete suppliers. Unlike general hardware stores, they specialize in concrete products for residential and commercial use. Their range includes pavers, masonry blocks, decorative concrete, and high-strength mixes. Firth is best suited for large-scale or custom projects where quality and performance matter. They also work directly with trade professionals, which can be useful if you’re hiring a contractor.
PlaceMakers
PlaceMakers supplies both trade and DIY customers. They offer a strong range of landscaping products, including concrete pavers, retaining wall blocks, and bulk concrete mix. Many of their locations have drive-in yards, which makes it easier to load up heavy materials. PlaceMakers also provides delivery for larger jobs, including crane truck service in select areas.
Small Local Suppliers Vs. Big Box Stores
Big retailers like Mitre 10 and Bunnings offer wide availability, competitive pricing, and easy returns. But local suppliers often provide more personalized service, better knowledge of local soil and climate, and specialty items you won’t find in chain stores. If you’re tackling a complex or custom design, visiting a local supplier may be worth your time. Some smaller yards can even order products in bulk at better rates if you ask.
Delivery And Bulk Options
When dealing with heavy materials like concrete mix or pavers, delivery is often the most practical option. Most major suppliers in New Zealand offer same-day or next-day delivery, especially for bulk orders. Some even allow you to schedule crane truck drop-offs or pallet delivery directly to your driveway. If you’re working on a large job, ask about volume discounts or trade pricing, even if you’re doing it yourself.
By choosing the right supplier, you can make sure your project runs smoothly from start to finish. Whether you want convenience, custom options, or expert advice, New Zealand has plenty of concrete sources to meet your needs.

Cost Breakdown: What You Can Expect To Pay
If you’re planning to install concrete pavers in New Zealand, understanding the costs involved will help you set a realistic budget and avoid surprises. The total price depends on the type of concrete you choose, the size of your project, whether you’re going DIY or hiring a pro, and the materials you’ll need to prep the base properly.
Price Per Square Metre: Pavers vs. Poured Concrete
Concrete pavers in NZ generally cost between $40 and $100 per square metre. This price range depends on the style, size, and finish of the pavers you choose. Basic grey pavers are on the lower end, while textured or coloured options cost more.
Poured concrete usually ranges from $70 to $120 per square metre. While it can be more expensive upfront, it provides a seamless surface and can be shaped to fit curved or sloped areas. Decorative finishes like stamping or colouring will push the price higher.
If you’re deciding between the two, consider how the surface will be used. Pavers are easier to replace if damaged, while poured concrete may last longer with less shifting, especially on driveways.
Installation Cost If Hiring A Professional
Hiring a professional to install concrete pavers typically adds $50 to $100 per square metre, depending on site access, soil type, and project complexity. For poured concrete, labour costs can range from $60 to $120 per square metre, especially if you’re adding special finishes or need a more complex formwork.
For a standard 20m² patio, you could pay anywhere from $2,000 to $4,400 in labour alone, depending on which option you choose and who you hire.
Budgeting For Prep Materials
If you’re going the DIY route, you’ll still need to budget for prep materials to create a strong base and avoid future issues like sinking or cracking. Here’s what to expect:
- Base course (GAP 20 or similar): Around $10–$15 per bag or $100–$150 per cubic metre if buying in bulk
- Washed sand for bedding and joints: Roughly $8–$12 per 20kg bag
- Weed mat or geotextile fabric: Around $2–$5 per square metre
- Tools: You might need to rent or buy a plate compactor, wheelbarrow, string lines, trowel, and shovel. Tool hire can cost $50–$80 per day for a compactor alone
Don’t forget safety gear like gloves, knee pads, and dust masks, which can add another $50–$100 if you’re starting from scratch.
Quick Tip: DIY Saves Money But Takes Time
Taking the DIY route can save you hundreds, or even thousands, of dollars, especially on labour. But it requires time, patience, and planning. You’ll need to handle everything from digging and levelling to mixing concrete or laying each paver precisely. Mistakes can lead to uneven surfaces or drainage issues down the line.
If you’re confident in your skills and willing to put in the work, DIY is a great way to keep costs down. But for larger or more complex projects, hiring a professional might offer better long-term value and peace of mind.
By understanding the full cost breakdown, you’ll be better prepared to choose the right concrete paving solution for your home and avoid overspending. Always compare quotes, factor in material delivery fees, and build in a little buffer for unexpected costs.

Pros And Cons Of Using Concrete For Pavers
Choosing the right material for your outdoor paving project can make a big difference in how your space looks, feels, and holds up over time. Concrete is one of the most popular options across New Zealand, and for good reason. But like any material, it comes with its own set of trade-offs. Here’s a closer look at the key pros and cons of using concrete for pavers so you can decide if it’s the right fit for your path, patio, or driveway.
Pros Of Concrete Pavers
- Durable
Concrete is built to last. When properly installed over a compacted base, concrete pavers can handle foot traffic, garden gear, and even vehicle weight with minimal wear. They resist cracking better than poured concrete due to their individual block structure, which allows for slight movement in the surface. - Affordable
Compared to natural stone or brick, concrete pavers are easier on the wallet. They’re widely available across NZ from suppliers like Mitre 10 and PlaceMakers, and bulk buying options make them even more cost-effective. For homeowners working on a tight budget, concrete provides good value without sacrificing performance. - Custom Finishes
One of concrete’s biggest advantages is its flexibility in appearance. You can choose from a wide range of shapes, sizes, and surface textures. Want the look of cobblestone or slate without the price tag? Stamped or coloured concrete pavers offer that at a fraction of the cost. You can match the paver finish to suit your garden, home exterior, or design taste.
Cons Of Concrete Pavers
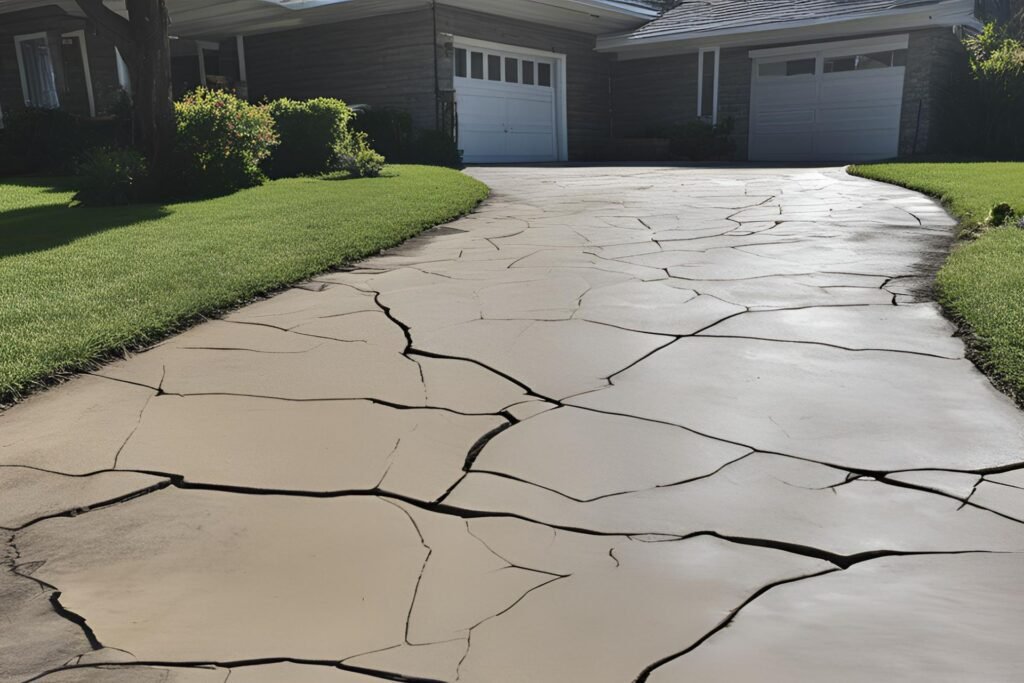
- Can Crack If Installed Wrong
Concrete pavers are strong, but poor installation can lead to cracking, sinking, or uneven surfaces. Skipping the compacted base layer or using the wrong joint filler can cause long-term issues. It’s essential to follow best practices or hire a professional if you’re unsure. - Heat Retention In Summer
Concrete tends to hold heat, especially in full sun. In warmer parts of New Zealand, paved areas can become uncomfortable to walk on barefoot during summer. Choosing lighter-coloured pavers can help reduce heat absorption, but it won’t eliminate it entirely. - Not As Natural-Looking As Stone
While modern concrete can mimic stone fairly well, it still lacks the irregular textures and organic charm of real natural stone. If you’re going for a high-end, rustic look, concrete might not fully match that aesthetic. That said, for most backyards and driveways, the clean, consistent finish of concrete is more than enough.
Understanding these pros and cons helps you make an informed choice based on your goals, budget, and design preferences. Whether you value durability, ease of installation, or low maintenance, concrete pavers offer a practical option that works well in most NZ settings.

Maintenance Tips For Long-Lasting Pavers
Taking care of your concrete pavers doesn’t need to be difficult, but regular upkeep makes a big difference. If you want your outdoor area to keep looking sharp and stand up to New Zealand’s changing weather, follow these simple maintenance tips. They’ll help you protect your investment and avoid early repairs.
Cleaning With Water And Mild Soap
Over time, outdoor pavers collect dirt, moss, algae, and stains from foot traffic, pets, or the garden. A gentle wash with a garden hose and a bucket of warm water mixed with mild dish soap is often enough to clean the surface. Use a soft-bristle broom or scrubbing brush to loosen grime without damaging the concrete. Avoid using harsh chemicals or high-pressure washers too often, as they can wear down the surface or strip any sealant.
Sealing Every Few Years
Concrete is porous, which means it absorbs moisture, oil, and other spills. Sealing your pavers creates a protective barrier that helps them resist stains, mould, and fading from UV exposure. In most New Zealand climates, resealing every two to three years works well. Choose a sealer based on the type of concrete finish, some enhance colour while others leave a natural look. Always clean the surface first and make sure it’s completely dry before applying the sealant.
Checking Joints For Weed Growth
Weeds can quickly take root between pavers if the joints aren’t maintained. Sweep polymeric sand or jointing sand back into the gaps to keep them filled and compact. This not only stops weeds from growing but also helps lock the pavers in place and prevents shifting over time. Inspect the joints every few months, especially after heavy rain or strong wind.
Fixing Minor Cracks Early
Small cracks can turn into larger problems if ignored. Whether it’s due to movement in the base, water penetration, or freeze-thaw cycles in cooler parts of NZ, even tiny cracks should be repaired as soon as they appear. Use a concrete patching compound or crack filler designed for exterior use. Keeping an eye out for early signs of wear will save you time and money in the long run.
Keeping your pavers clean, sealed, and stable doesn’t just make your outdoor space look good, it helps it last longer. These steps are simple but effective, and when done regularly, they reduce the chances of bigger problems later on. Whether your pavers are part of a patio, walkway, or driveway, regular maintenance keeps them looking their best year-round.

Alternatives To Concrete For Paving
While concrete is a reliable and cost-effective choice, it’s not the only option available for paving your outdoor spaces in New Zealand. Depending on your style, budget, and how you use the space, you might prefer a different material. Here’s a quick look at four popular alternatives to concrete for paving: natural stone, clay bricks, timber decking, and gravel paths. Each one offers a unique finish, and knowing the pros and cons can help you decide what works best for your project.
Natural Stone
Natural stone pavers, such as bluestone, granite, or sandstone, bring a timeless and premium look to any space. They’re incredibly durable and weather-resistant, making them ideal for patios, paths, and courtyards. Stone tends to cost more than concrete, both in materials and installation, but the natural variation in color and texture adds instant appeal. Maintenance is low, although sealing the surface can help preserve the color and reduce staining.
Clay Bricks
Clay brick pavers have a warm, traditional look that suits both heritage and modern homes. They’re made from fired natural clay, which gives them strength and rich color that won’t fade over time. Bricks can handle New Zealand’s wet weather well and are often used for garden paths and driveways. They are typically more expensive than concrete but offer long-term value. Maintenance involves occasional weed control between joints and replacing cracked units if needed.
Timber Decking
Timber is a great alternative if you’re looking for a softer, more natural feel underfoot. It works especially well in raised areas or where you want to blend into the landscape. Hardwood options like kwila or vitex are popular in NZ for their durability and look. However, timber requires regular maintenance, such as oiling or staining to prevent weather damage. It’s not ideal for heavy loads or high-traffic driveways but is perfect for patios, balconies, and poolside areas.
Gravel Paths
Gravel is one of the most budget-friendly and flexible paving options. It’s easy to install, requires minimal prep, and works well for informal paths and garden walkways. Drainage is excellent, which makes it suitable for areas with heavy rain. On the downside, gravel can shift over time, requires occasional raking, and might not be the best choice if you want a clean, polished look. Edging is recommended to keep it in place.
Quick Comparison: Cost, Look, And Maintenance
- Natural Stone: High cost, premium look, low maintenance
- Clay Bricks: Moderate to high cost, classic look, medium maintenance
- Timber Decking: Moderate cost, natural finish, high maintenance
- Gravel Paths: Low cost, casual look, low to medium maintenance
Choosing the right alternative to concrete depends on your budget, the overall style of your home, and how much upkeep you’re willing to do. If you’re aiming for elegance, natural stone or bricks stand out. For a relaxed vibe with minimal effort, gravel may be all you need. Timber adds warmth but comes with more ongoing care. Consider all options before making your final decision.
Ready to start your paving project? Visit us to explore quality concrete options, tools, and expert tips, all in one place. Get everything you need to build better outdoors.

FAQs: About Concrete Pavers In NZ
What type of concrete is best for pavers in New Zealand?
Precast concrete pavers are ideal for most DIY projects due to their ease of installation and durability. For custom shapes or finishes, poured-in-place concrete is a better choice. In decorative spaces, stamped or coloured concrete adds visual appeal.
Can I install concrete pavers myself?
Yes, many homeowners in NZ install concrete pavers themselves. You’ll need basic tools, proper base preparation, and enough time to follow each step carefully. A compacted base and correct leveling are key to success.
How deep should the base be under concrete pavers?
A typical base should be 100–150mm deep for paths and patios. Driveways may need 200mm or more, depending on soil type and load. Use GAP 20 or similar base course material.
Do I need council approval to install concrete pavers in NZ?
In most cases, no. However, check with your local council if you’re paving large areas or close to boundaries, drainage paths, or public land. Rules can vary between regions.
How much do concrete pavers cost in NZ?
Concrete pavers range from $40 to $100 per square metre depending on size, finish, and supplier. Add costs for base materials, tools, and optional sealants if doing it yourself.
What’s the difference between concrete pavers and poured concrete?
Concrete pavers are pre-made blocks laid over a compacted base. Poured concrete is mixed and shaped on-site. Pavers allow for easier repairs and a modular look, while poured concrete gives a seamless surface.
How do I maintain concrete pavers?
Sweep regularly, clean with mild soap and water, and seal every 2–3 years to protect against stains and weather. Keep joints filled with sand to prevent weed growth and shifting.
Will concrete pavers crack over time?
Concrete is strong, but pavers can crack if the base shifts, freezes, or is poorly compacted. Using quality materials and proper prep reduces the risk of cracking.
Are concrete pavers suitable for driveways in NZ?
Yes, as long as you choose heavy-duty pavers and install a deeper base (at least 200mm). Poured concrete driveways may offer better load distribution, but pavers provide easier spot repairs.
Where can I buy concrete pavers in NZ?
Concrete pavers are available at Bunnings, Mitre 10, Firth, PlaceMakers, and local landscaping suppliers. Some stores offer bulk discounts and delivery for large projects.
Conclusion
Concrete remains a smart, long-lasting choice for paving projects across many New Zealand homes, offering a mix of durability, affordability, and style that suits a wide range of outdoor spaces. Whether you’re planning a small garden path or a full driveway, it’s worth taking the time to assess your site conditions, soil type, and intended use to choose the right concrete option. Think about the look you want, how much traffic the area will get, and whether you’re taking the DIY route or hiring a contractor. For the best results, consider speaking with a local supplier or paving expert who understands NZ’s climate and can recommend suitable materials and techniques. If you’re reading this on our blog and still have questions or want to share your own paving experience, feel free to leave a comment below, we’d love to hear from you.
About the Author:
Mike Veail is a recognized digital marketing expert with over 6 years of experience in helping tradespeople and small businesses thrive online. A former quantity surveyor, Mike combines deep industry knowledge with hands-on expertise in SEO and Google Ads. His marketing strategies are tailored to the specific needs of the trades sector, helping businesses increase visibility and generate more leads through proven, ethical methods.
Mike has successfully partnered with numerous companies, establishing a track record of delivering measurable results. His work has been featured across various platforms that showcase his expertise in lead generation and online marketing for the trades sector.
Learn more about Mike's experience and services at https://theleadguy.online or follow him on social media: